

A tankless water heater heats water as you use it instead of storing hot water in a tank. Multiple factors go into the cost of tankless water heater installation in Kansas City, including system size, fuel type, venting, and any required gas, electrical, or plumbing upgrades.
Tankless systems offer longer equipment life, take up less space, and heat water on demand. Traditional tank systems cost less to install and store a set amount of hot water for periods of high demand.
Schedule OnlineHow a Tankless Water Heater Works
A tankless system starts heating water when you open a hot-water fixture:
- Water flowing through the unit activates a flow sensor.
- A gas burner or electric heating element heats the water as it passes through the heat exchanger.
- Heated water travels to the open faucet, shower, or appliance.
The system stops heating when hot-water demand ends. Because there is no storage tank, the unit does not continuously heat a supply of stored water.
Tank vs Tankless: Side by Side
The main differences come down to initial cost, how each system heats water, available hot-water capacity, equipment life, and maintenance.
| Water Heater Comparison | Tank Water Heater | Tankless Water Heater |
|---|---|---|
| Upfront Cost | Lower | Higher |
| How Water Is Heated | Keeps stored water hot | Heats water on demand |
| Lifespan | About 8–12 years | About 20 years or longer |
| Space | Requires room for tank | Compact, often wall mounted |
| Capacity | Limited by tank size | Limited by flow rate |
| Maintenance | Periodic tank maintenance | Regular flushing and descaling |
Anthony's water heater services in Kansas City cover traditional tank and tankless systems, while water heater replacement includes removing the existing equipment and installing the new system.
What Size Tankless Do You Need
Tankless water heaters are sized by flow rate in gallons per minute (GPM) and the temperature rise needed to bring incoming water to the desired temperature.
Use these steps:
- Calculate simultaneous demand. Add the GPM of the hot-water fixtures you expect to run at the same time.
- Determine incoming water temperature. Colder incoming water requires the heater to produce a greater temperature rise.
- Set the desired output temperature. Subtract incoming water temperature from the desired hot-water temperature.
- Match the unit to both numbers. The system must deliver the required GPM at the required temperature rise.
For example, two showers using 2.6 GPM each require 5.2 GPM. If incoming water is 40F and the desired temperature is 105F, the unit needs to deliver a 65F temperature rise while supplying 5.2 GPM.
Colder incoming water during a Kansas City winter increases the temperature rise the unit must produce, which affects how much hot water it can deliver at once.
What Tankless Costs Installed in Kansas City
Installation cost depends on:
- Tankless unit capacity
- Natural gas, propane, or electric equipment
- Gas-line or meter changes
- Venting requirements
- Electrical upgrades
- Plumbing modifications
- Installation location
Tankless systems avoid the standby heat loss of storing hot water, but the higher installation cost can extend the payback period. Hot-water use, fuel rates, installation cost, and the equipment being replaced all affect the math.
Qualified homeowners can use Anthony's financing options to spread the installation cost over time.
Schedule OnlineMaintenance in Kansas City's Hard Water
Minerals in the water can build up inside a tankless heat exchanger. Regular flushing and descaling remove those deposits before they restrict water flow or interfere with heat transfer.
Water quality and manufacturer requirements determine the maintenance schedule. Anthony's maintenance plan can include scheduled water heater maintenance.
Is Tankless Right for You?
Consider tankless when:
- You want a longer expected equipment life.
- Space occupied by a storage tank is limited.
- Your peak hot-water demand fits the unit's GPM capacity.
- Your home supports the required gas or electrical load.
- You are prepared for regular flushing and descaling.
A tank system keeps the initial cost lower and avoids the flow-rate limits that become important when several high-demand fixtures run at once. Tankless installation can become expensive when the home needs major gas or electrical upgrades.
Anthony's tankless installation and repair service covers system sizing, new installations, and repairs for existing equipment. An undersized unit can lose hot-water capacity when several fixtures run at once.
Schedule OnlineDrain cleaning clears clogs from individual sinks, tubs, showers, and other drains. Sewer line cleaning clears blockages in the main line that carries wastewater away from your home. If several drains are slow or backing up at the same time, the problem may be in the main sewer line.
Professional cleaning uses drain cables or hydro jetting to clear the affected line.
Signs Your Drains or Sewer Line Need Cleaning
Hair, soap, grease, and other debris can restrict individual drains. Recurring clogs across several fixtures point to a blockage farther down the drainage system.
Watch for:
- Water draining slowly
- Gurgling from drains
- Recurring clogs
- Unpleasant drain odors
- Water backing up through another fixture
- Several drains slowing or backing up together
Multiple drains clogged at once, especially in different areas of the house, point to a possible main sewer line blockage. A basement drain backing up also points toward a blockage restricting wastewater flow through the main line.
Drain Cleaning vs Sewer Line Cleaning: What's the Difference
Anthony's professional drain cleaning services clear clogs in individual drains and branch lines serving sinks, tubs, and showers. These clogs commonly involve hair, soap buildup, grease, or debris within a smaller section of the drainage system.
Sewer line cleaning in Kansas City focuses on the main line carrying wastewater from the home. Problems in this line tend to affect several drains rather than a single fixture, causing widespread slow drainage or backups.
Professional Cleaning Methods
The cleaning method depends on where the blockage is located and what is restricting the pipe.
Cabling / Snaking
A drain cable travels through the pipe to break apart or remove an obstruction. Cabling clears many localized clogs caused by hair, food debris, and other material concentrated in one section of pipe.
Hydro Jetting
Hydro jetting uses high-pressure water to remove grease, sludge, and other buildup from the inside of a drain or sewer line.
What You Can Safely Do Yourself
A plunger is a reasonable first step for a simple clog affecting one drain. A hand-operated drain snake can clear some accessible sink or tub clogs. Learn how to use a drain snake safely before feeding a cable into an accessible drain.
Stop DIY attempts when the blockage keeps returning, the snake cannot clear it, wastewater backs up, or several drains are affected. Those symptoms point to a problem deeper in the drainage system.
Avoid chemical drain cleaners. Chemical cleaners can damage some piping and expose a plumber to chemicals left inside the drain.
Preventing Clogs
Good drain habits reduce the amount of grease, hair, food debris, and other material entering your plumbing.
Kitchen
Keep cooking grease and oil out of the drain. Scrape food scraps into the trash before rinsing dishes and use a drain strainer to catch larger debris.
Bathroom
Use strainers to catch hair in showers and tubs. Keep wipes, paper towels, hygiene products, and other non-flushable materials out of toilets and drains.
Main Line and Tree Roots
Tree roots can enter sewer piping through cracks, damaged connections, and failing joints. Once inside, roots can catch waste and restrict flow.
Older Kansas City neighborhoods combine mature trees with sewer lines that may have been underground for decades. An inspection can identify roots, pipe damage, or accumulated debris behind recurring main-line clogs.
Routine cleaning can remove buildup, but it does not repair a cracked or damaged sewer pipe.
When to Call Anthony
Recurring clogs, several affected drains, and wastewater backups point toward a problem deeper in the drainage system. Anthony's main sewer line cleaning service addresses obstructions in the line carrying wastewater away from your home.
Anthony has served the Kansas City area since 1951. Our plumbers locate the blockage before clearing the affected drain or sewer line.
When we talk with homeowners in northeast Kansas and northwest Missouri, sump pumps come up more often than you’d think. Around here, you get a mix of clay soil, quick spring storms and basements that sit just low enough for water to sneak in. Picking the best sump pump isn’t about finding the fanciest model on the shelf. It’s more about understanding what your basement deals with, how fast water collects and which type of pump is built for the way homes in this region handle moisture.
Why Choosing the Right Sump Pump Matters in Our Region
Our soil holds onto water longer than sandy or rocky ground, and after a few days of steady rain, that groundwater starts looking for a place to go. Basements in northeast Kansas and northwest Missouri take the brunt of that pressure. Even newer homes feel it, especially those with deeper foundations or in neighborhoods where the grade drops toward the house.
A sump pump that’s sized right and installed correctly helps prevent:
- Water puddling across the basement floor
- Damp corners that lead to mold problems
- Foundation strain during long wet periods
- Repeat flooding after fast-moving storms
Breaking Down Sump Pump Types
Different basements need different solutions. Here’s how each pump type works and when it tends to be the better fit.
Submersible Sump Pumps
A submersible pump sits down in the pit and runs underwater. This helps keep it quiet and lets it move a lot of water quickly. A 1/2 horsepower submersible pump with a strong flow rate is often one of the best submersible sump pump choices for homes that take on moisture during heavier storms. These pumps handle deep pits well and are a good match for finished basements where noise matters.
Pedestal Sump Pumps
Pedestal pumps keep the motor above the pit. You can reach them easily, and they’re usually more affordable. They don’t move as much water as submersible pumps, but for basements that only get occasional moisture, they do the job. A pedestal model with a thermoplastic housing is a common budget-friendly choice.
Water-Powered Backup Sump Pumps
These backups use municipal water pressure to push groundwater out of the pit. They don’t rely on electricity, which makes them useful during outages. They’re part of many backup sump pump buying guide lists because they run as long as city water pressure stays strong. Homes on private wells usually cannot use them.
Top Recommended Sump Pumps for Homes in Kansas & Missouri
Below are general categories of pumps that tend to perform well in our region. These aren’t brand names, just examples of setups that fit local basement conditions.
Best Overall: A cast-iron 1/2 HP submersible with a high lift rating
This type handles deeper pits, steady water flow and longer run times. Cast iron helps with cooling, which is important during back-to-back storms.
Best for Heavy Rainfall Areas: A 3/4 HP submersible with reinforced internals
In low-lying neighborhoods or places that get runoff, you want a pump that can move water fast. Reinforced impellers help when silt or grit finds its way into the pit.
Best Budget-Friendly Option: A pedestal pump with thermoplastic construction
Good for homes with shallow pits or light moisture. Easy to maintain and straightforward to install.
Best Backup System: A battery-powered backup pump with automatic switch
When bad weather knocks out the power, this keeps the basement protected. Many homeowners in our area choose this style as their best battery backup sump pump.
Comparing Sump Pump Features
When you’re trying to pick the best sump pump, a few features matter more than the others. Here’s what a technician usually looks at:
- Horsepower: More horsepower moves more water, which helps during storms.
- Flow rate: Measures how fast the pump can empty the pit.
- Materials: Cast iron lasts longer; thermoplastic keeps the cost down.
- Switch type: Vertical, tethered or electronic, each fits different pit designs.
- Noise level: Submersible pumps are the quietest option.
- Warranty: Longer warranties usually mean better construction.
These features help you match a pump to your home instead of guessing.
Signs You Need to Replace Your Existing Sump Pump
Pumps in our region put in a lot of work, especially in spring. Over time, the signs of wear start to show.
Look for:
- Grinding, humming or rattling noises
- Frequent on-off cycling
- Rust or corrosion
- Water collecting near the pit
- A pump that struggles to keep up during storms
When you start noticing these, it’s usually smarter to replace the sump pump before storm season ramps up.
Professional Installation vs. DIY Considerations
Installing a sump pump isn’t the hardest job in the world, but it’s easy to make mistakes with pit depth, discharge routing or valve placement. These issues often don’t show until the first big storm. Professional sump pump installation ensures the pump matches your pit size, your home’s drainage patterns and the local soil conditions.
Most homeowners in this region choose expert installation for peace of mind. When the weather turns fast, you want a setup that just works.
How to Maintain Your Sump Pump for Long-Term Protection
A little routine care keeps your pump ready when the next storm hits. Here are simple steps that help:
- Test the pump monthly with added water
- Clear out debris in and around the pit
- Check the discharge line for blockages
- Schedule a yearly inspection before spring
These steps help your pump perform when moisture levels spike.
Schedule a Sump Pump Consultation or Installation
Homes across northeast Kansas and northwest Missouri benefit from sump pumps chosen with local soil, basement depth and rainfall patterns in mind. If you want help choosing the best basement sump pump or backup system, schedule an estimate and we’ll walk you through the options.
Schedule OnlineAs a homeowner in Kansas or Missouri, plumbing issues can arise unexpectedly, disrupting your daily routine and potentially causing costly damage.
While some problems are easy to spot, others may go unnoticed until they become serious. Understanding these common plumbing issues and how to diagnose them can save you time, stress, and money.
Identifying Common Plumbing Issues in Your Home
Plumbing problems can start small but quickly escalate into expensive repairs if ignored. Identifying issues early is the best way to make sure your home remains safe, functional, and free from unexpected water damage.
Below, we’ll expand on five common plumbing problems, including tips for identifying their root causes and understanding why they’re important to address.
1. Dripping Faucets
It’s easy to overlook a dripping faucet, but the constant dripping can add up - both in water usage and potential damage.
What to Look For:
- Persistent dripping that doesn’t stop, no matter how tightly you turn the faucet handle.
- Mineral buildup or visible corrosion around the spout or handles.
- Changes in water flow or pressure when the faucet is in use.
Potential Causes:
- A worn-out washer or O-ring that needs replacing.
- Corrosion in the valve seat, where the faucet connects to the water supply.
- Installation errors that compromise the faucet’s performance.
Why It’s Important:
Dripping faucets aren’t just a nuisance - they can waste hundreds of gallons of water annually, driving up utility costs.
Also, the excess moisture can lead to mold or mildew in your kitchen or bathroom, creating unhealthy conditions.
Pro Tip:
Check all faucets in your home regularly for early signs of wear, especially in high-use areas like the kitchen and bathrooms.
2. Low Water Pressure
Low water pressure isn’t just an inconvenience - it can indicate serious plumbing problems lurking behind the walls.
What to Look For:
- Weak or inconsistent water flow from your faucets or showerheads.
- A sudden drop in water pressure, especially after a repair or maintenance service.
- Noticeable differences in pressure between hot and cold water.
Potential Causes:
- Mineral deposits in your plumbing lines, particularly if your home has hard water.
- A partially closed or malfunctioning shutoff valve that restricts flow.
- Hidden leaks in your pipes or fixtures.
When to Call a Professional:
If cleaning aerators or showerheads doesn’t resolve the issue, it could signal a more significant problem like pipe corrosion or a break in your main water line.
Professional diagnostics are necessary to pinpoint the issue and avoid further damage.
Pro Tip:
Invest in a water softener if you live in an area with hard water to minimize mineral buildup over time.
3. Running Toilets
A running toilet might not seem urgent, but it can waste gallons of water daily and drive up your utility bills.
What to Look For:
- The sound of water running continuously, even when the toilet isn’t in use.
- A toilet that refills its tank repeatedly without being flushed.
- Higher-than-normal water bills without an increase in usage.
Potential Causes:
- A worn or damaged flapper valve, which regulates water flow between the tank and the bowl.
- A misaligned or disconnected fill tube.
- Improperly adjusted float height, causing the tank to overfill.
Why It’s Important:
Ignoring a running toilet can waste up to 200 gallons of water daily, translating into unnecessary costs. It also often signals a problem with internal components, which may eventually lead to complete toilet failure.
Pro Tip:
Check your toilet’s internal components regularly for wear and tear, especially in older fixtures. Replacing a flapper valve is a simple and affordable fix for many running toilet issues.
4. Clogged Drains
Clogged drains are among the most common - and frustrating - plumbing problems. They can range from minor inconveniences to major blockages that disrupt your household.
What to Look For:
- Water pooling in sinks, tubs, or showers instead of draining quickly.
- Persistent foul odors emanating from the drain.
- Gurgling or bubbling noises when water flows down the drain.
Potential Causes:
- Hair, grease, food particles, or soap scum blocking the pipes.
- A buildup of non-degradable items like wipes or paper towels flushed down toilets.
- Tree roots infiltrating outdoor pipes or sewer lines.
How to Address It:
While plungers and drain snakes can clear minor clogs, persistent blockages often require professional attention to prevent damage to your plumbing system.
Pro Tip:
Install drain covers in sinks and showers to catch hair and debris, and avoid pouring grease or oil down the kitchen sink to reduce the risk of clogs.
5. Leaky Pipes
Leaky pipes are a homeowner’s nightmare, often causing extensive water damage before they’re even noticed.
What to Look For:
- Visible water stains or damp spots on ceilings, walls, or floors.
- Musty odors, signaling potential mold or mildew growth.
- A sudden spike in your water bill with no apparent cause.
Potential Causes:
- Aging pipes that have corroded or cracked over time.
- Improper pipe installation or joints that have come loose.
- Excessively high water pressure putting stress on your plumbing system.
Why It’s Important:
A single leak can cause severe structural damage to your home, including weakened flooring and mold infestations. Leaks also waste water and can go unnoticed for weeks or months, increasing the damage.
Pro Tip:
Schedule regular plumbing inspections, especially if your home has older pipes, to catch potential leaks before they escalate.
When to Call a Professional for Plumbing Issues
While some plumbing problems can be managed with DIY efforts, many require professional expertise to diagnose and resolve effectively.
Signs You Need Professional Help:
- Persistent issues despite troubleshooting.
- Visible signs of water damage.
- Problems involving hidden pipes or your main water line.
At Anthony, we specialize in providing expert plumbing solutions for Kansas and Missouri homeowners. Whether you’re dealing with a stubborn clog, low water pressure, or a mysterious leak, our team is here to help.
Contact Us Today:
If you’re experiencing plumbing issues, don’t wait for them to escalate. Call Anthony at (913) 298-0444 today.
Few things are more frustrating than dealing with a toilet that won’t flush or, worse, one that’s overflowing. It can throw off your whole day, leaving you anxious about the mess and wondering what went wrong.
At Anthony Plumbing, we understand how overwhelming these situations can be, and we’re here to help you troubleshoot the issue and restore your peace of mind.
Why Toilets Overflow and Won’t Flush
Toilets can overflow or fail to flush for several reasons. Understanding these common causes can help you identify the issue and determine whether a DIY fix will suffice or if it’s time to call a professional:
1. Clogged Drain
A clogged drain is one of the most common reasons for a toilet overflow. Blockages in the drain can prevent water from properly exiting the bowl, leading to water backing up and overflowing.
This often happens due to an excessive buildup of toilet paper, waste, or non-flushable items.
2. Blocked Vent Pipe
Toilets rely on vent pipes to maintain air pressure in the plumbing system. A blocked vent pipe can prevent proper flushing by disrupting airflow, causing water to back up and potentially overflow.
Vent blockages, often due to debris or animal nests, usually require professional tools to clear.
3. Malfunctioning Fill Valve or Flapper
The fill valve and flapper inside the tank control water flow and flushing. If these components wear out or become misaligned, it can prevent the toilet from flushing fully or cause water to rise unexpectedly.
Hard water can contribute to mineral buildup, impacting the fill valve’s performance over time.
4. Broken Flush Handle
If the flush handle feels loose or isn’t working, it might be worn out or disconnected from the chain that lifts the flapper.
A broken handle prevents a proper flush and may require replacement to restore normal operation.
5. Poorly Installed Chain
The chain connecting the flush handle to the flapper needs the right tension to function properly. If it’s too tight or too loose, it can cause issues like incomplete flushes or water leaks. Checking the chain condition inside the tank can help you diagnose this issue.
6. Blocked Rim Jets
If you notice a sluggish flush, it could be due to mineral deposits blocking the rim jets. These jets release water around the bowl when you flush.
If they’re clogged, water flow is restricted, impacting the flush quality. Regular cleaning or descaling can help prevent rim jet blockages, especially in areas with hard water. So, how do you unclog an overflowing toilet?
DIY Troubleshooting Tips
If you’re dealing with a minor issue, there are a few things you can try on your own:
- Plunge the Toilet: If you suspect a clog, try using a plunger. Ensure the plunger creates a good seal and apply steady pressure to push the blockage through. Avoid using excessive force to prevent splashing and further mess.
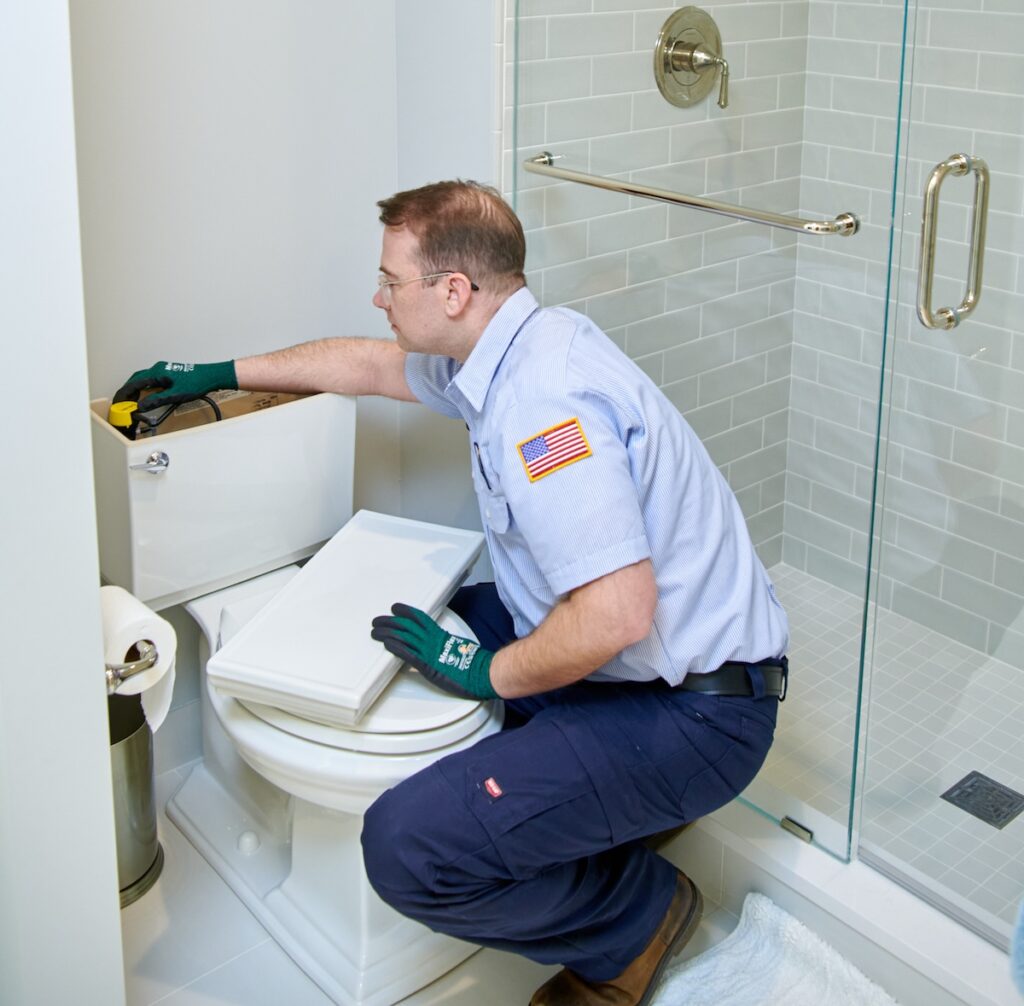
- Check the Fill Valve and Flapper: Remove the tank lid and check if the fill valve and flapper are functioning correctly. If the flapper isn’t sealing properly, adjust it or consider replacing it.
- Turn Off the Water Supply: If the toilet is overflowing, locate the shutoff valve behind the toilet and turn it clockwise to stop water from flowing in. This will help prevent further mess until you can identify the problem.
While these DIY steps can help with minor issues, remember that some problems require professional attention. Avoid the temptation to repeatedly flush or use chemical drain cleaners, as this can worsen the situation.
When to Call a Professional
Sometimes, toilet issues go beyond what a quick fix can solve.
Here’s when to consider reaching out to a professional:
- Frequent Overflows: If your toilet overflows regularly, it could be a sign of a deeper plumbing issue. A professional can inspect the system to identify any hidden blockages or structural issues.
- Persistent Water Rising: If the water rises in the bowl without flushing, it may indicate a problem with the vent pipe or sewer line, which requires specialized tools and expertise to resolve.
- Leaks at the Base: If you notice water pooling around the base of your toilet, it might be due to a faulty wax ring or other seal. This type of leak requires professional repair to prevent water damage.
At Anthony Plumbing, we offer comprehensive toilet repair services that address everything from simple clogs to complex plumbing problems. Our licensed technicians are equipped to diagnose the issue and get your toilet back to normal quickly and efficiently.
Why Choose Anthony for Your Toilet Repairs?
With over 70 years of experience, Anthony Plumbing has been the go-to choice for reliable plumbing services.
Here’s what sets us apart:
- Experienced Technicians: Our team is licensed, insured, and experienced, ensuring that every repair is done right the first time.
- Transparent Pricing: We provide upfront pricing with no hidden fees, so you’ll always know what to expect before we start any work.
- State-of-the-Art Tools: We use the latest technology to diagnose and repair plumbing issues, ensuring efficient and lasting solutions.
When you choose Anthony Plumbing, you’re choosing a team dedicated to getting your home’s plumbing back on track with minimal disruption.
Get Your Toilet Fixed Today
Don’t let an overflowing or malfunctioning toilet ruin your day. Anthony Plumbing is here to provide fast, reliable repairs that restore your peace of mind.
Contact us today to schedule an appointment, and let us handle your plumbing issues with the expertise and care you deserve.
Garbage disposals are a helpful addition to many kitchens, making cleanup faster and easier. However, they’re not designed to handle all food waste.
Knowing what can and can’t go down the drain is critical for keeping your appliance – and your plumbing – in good condition. Misuse can lead to clogs, damaged blades, and even costly repairs.
In Kansas and Missouri, where Anthony Plumbing, Heating, Cooling, & Electric provides top-quality service, we often see preventable issues that could have been avoided with a little more knowledge.
To help you make informed choices, here are some common mistakes to avoid and effective solutions for disposing of food waste properly.
What Can You Put in a Garbage Disposal?
Garbage disposals are designed to grind down soft food scraps, making it easier to clean up after meals. However, not all foods are created equal.
Understanding what’s safe to send down the drain is the first step to preventing plumbing issues.
Here’s a list of items that are generally safe to put in your garbage disposal:
- Soft Fruits and Vegetables: Small scraps of fruits and veggies such as apple peels, carrot shavings, and cucumber skins can go down the disposal without issue.
- Citrus Peels: Lemon, lime, and orange peels are not only safe but can also help freshen up your disposal. Just be sure to cut them into smaller pieces first.
- Small Amounts of Cooked Meat: While it’s best to avoid bones or large chunks, small amounts of finely chopped cooked meat can be safely processed.
- Coffee Grounds (in moderation): While some believe coffee grounds help clean the disposal, use them sparingly as they can build up and form a sludge-like consistency over time.
What to Put in a Garbage Disposal for Smell
To keep your garbage disposal smelling fresh, consider using a combination of natural options like:
- Ice Cubes: Drop a few ice cubes into the disposal to help knock off residue from the blades.
- Vinegar: Ice cubes made from white vinegar can be especially effective.
- Citrus Peels: As mentioned earlier, these not only grind well but also leave a pleasant scent.
What Not to Put in a Garbage Disposal
Using your garbage disposal incorrectly can lead to clogged drains, dull blades, and even the need for a full replacement. Some items may seem harmless but can cause serious issues.
Here’s a comprehensive list of what to avoid:
- Grease, Oil, or Fat: These substances solidify as they cool, leading to clogged pipes.
- Fibrous Vegetables: Avoid celery, asparagus, and corn husks, as their stringy fibers can tangle around the disposal’s blades.
- Potato Peels: Starchy foods like potato peels can form a paste that clogs both the disposal and the drain.
- Eggshells: The membrane layer inside eggshells can wrap around the blades, while the hard shell particles can stick in the pipes.
- Pasta and Rice: These expand when in contact with water, making them a major clog risk.
- Bones, Seeds, or Pits: Hard items like chicken bones, fruit pits, or seeds are too tough for the blades and can damage the disposal.
- Non-Food Items: Paper, plastic, or any non-food materials should never go down the disposal.
How to Properly Dispose of Food Waste at Home
If you’re looking for alternatives to your garbage disposal, consider the following solutions:
- Composting: Composting is a sustainable way to dispose of fruit and vegetable scraps, coffee grounds, eggshells, and more. Set up a compost bin in your backyard or use a countertop compost collector if you have limited space.
- Trash Disposal: For items that are unsuitable for the garbage disposal (such as bones, oils, or fats), dispose of them in your regular trash bin. To minimize odors, seal food waste in biodegradable bags.
- Recycling Cooking Oil: Many local recycling centers in Kansas and Missouri accept used cooking oil. Check your local community guidelines for drop-off locations.
- Freeze Before Discarding: For items like fish scraps or other food that may smell, store them in the freezer until trash day.
- Use a Food Recycler: Countertop food recyclers can dehydrate and grind up food scraps, reducing the volume and odor of waste.
How to Maintain Your Garbage Disposal
Regular maintenance is essential for keeping your garbage disposal in good condition.
Here are some quick tips to help you avoid unnecessary repairs:
- Run Cold Water: Always run cold water while using the disposal to help solidify any grease and wash food particles through the drain.
- Clean the Blades: Periodically run ice cubes through the disposal to clean and sharpen the blades.
- Avoid Overloading: Feed small amounts of waste gradually to avoid overwhelming the system.
- Use a Disposal Cleaner: Purchase a biodegradable disposal cleaner or make a homemade mix of baking soda and vinegar to clean the unit once a month.
- Check the Blades: If your disposal isn’t grinding as effectively, it may be time to call a professional to inspect the blades.
Final Thoughts
Proper use and maintenance of your garbage disposal are essential for keeping your kitchen plumbing in great shape. By understanding what can and cannot go into your disposal, you can prevent costly repairs and extend the life of your unit.
If you’re experiencing issues or need expert advice on kitchen plumbing, the professionals at Anthony are here to help.
Remember, a little prevention goes a long way in protecting your garbage disposal and ensuring the smooth operation of your home’s plumbing system.
If your garbage disposal isn’t working, it can quickly become a frustrating issue in your kitchen. When a garbage disposal malfunctions, it can disrupt your entire household routine.
In this blog post, we’ll explore four common problems homeowners face with garbage disposals and offer practical solutions to help you troubleshoot these issues.
Problem 1: Garbage Disposal Won’t Turn On
Signs and Symptoms
You flip the switch, and nothing happens—no sound, no movement, and no signs of life. This is a strong indication that your garbage disposal isn’t receiving power, which typically points to an electrical issue rather than a mechanical failure.
Diagnosing the cause can save you from unnecessary repairs or replacements.
Possible Causes
- Tripped Circuit Breaker: Garbage disposals can occasionally overload the circuit, causing the breaker to trip. This is particularly common if there is a power surge or if the disposal is working too hard to grind dense food materials.
- Faulty Power Outlet: Sometimes, the problem lies not with the disposal but with the power outlet itself. A defective outlet or loose wiring can prevent your unit from turning on.
- Internal Reset Button: Modern garbage disposals often feature a built-in safety feature—an internal reset button that trips when the motor overheats. This can occur if the disposal has been running for an extended period or has been working harder than usual.
Solutions
- Check the Circuit Breaker: Locate your home’s breaker box and inspect the switches. If you find one in the "off" position, flip it back to "on" and then try turning the disposal on again. If the breaker trips repeatedly, you may have a deeper electrical issue that needs professional attention. For assistance with electrical problems, check out our electric circuit breaker repair services.
- Test the Outlet: Plug a small appliance, such as a phone charger or lamp, into the same outlet your garbage disposal uses. If the appliance doesn’t work, the problem may lie with the outlet or wiring. To prevent further electrical issues, have an electrician inspect the outlet. Learn more about our electrical services for comprehensive home support.
- Press the Reset Button: Most garbage disposals have a small red or black reset button on the bottom or side of the unit. With the disposal turned off, press this button firmly. If the motor has overheated, this should reset it and restore functionality.
Problem 2: Garbage Disposal Is Not Draining
Signs and Symptoms
You notice water pooling in your sink or find that your garbage disposal is draining slowly. This is typically due to a clog somewhere within the disposal or the plumbing lines connected to it.
Possible Causes
- Clogged Drain Line: When food waste, grease, or fibrous materials like potato peels or celery are ground up and sent down the drain, they can accumulate over time and cause a clog in the drain line.
- Blocked Trap: The U-shaped pipe under your sink, called the P-trap, is a common location for clogs to occur. Food waste, grease, and even non-organic materials can collect here, preventing proper drainage.
Solutions
- Clear the Clog with a Plunger: A simple plunger can sometimes dislodge minor clogs. Use a standard sink plunger, creating a tight seal around the drain, and apply firm, consistent pressure.
- Inspect and Clean the P-Trap: If plunging doesn’t work, the issue may be in the P-trap. Place a bucket under the pipe to catch any water, then use a wrench to disconnect the P-trap and manually remove any debris.
Problem 3: Garbage Disposal Is Humming but Not Working
Signs and Symptoms
You turn on your garbage disposal, and instead of the usual grinding noise, you hear a low hum. This usually means the disposal is getting power but is unable to operate due to a mechanical obstruction or motor failure.
Possible Causes
- Jammed Impellers: The impellers inside your garbage disposal can become stuck due to hard food waste or foreign objects like utensils. This prevents them from moving, causing the humming noise.
- Motor Failure: If the motor is weak or damaged, it may be receiving power but be unable to rotate the impellers. A humming sound without blade movement can indicate a failing motor.
Solutions
- Manual Rotation: Use a hex wrench on the bottom of the disposal to manually turn the blades and free any stuck impellers. This can sometimes dislodge small obstructions and get the unit working again.
- Unjam the Disposal with a Wooden Object: Insert a long object, like a wooden spoon, into the disposal and gently push the impellers. Avoid using your hands or metal tools, as these can damage the blades or result in injury.
- Consider Replacing the Unit: If the disposal continues to hum and won’t grind, it may be time to consider replacing the unit. Over time, motors can wear out, making replacement a more cost-effective solution than repair.
Preventative Tips to Keep Your Garbage Disposal Working
Your garbage disposal is one of the hardest-working appliances in your kitchen, and like any other piece of machinery, it requires regular maintenance and proper use to perform optimally.
Taking the right steps to care for your disposal can extend its lifespan and prevent costly repairs.
Avoid Hard Items
- What to Avoid: Bones, fruit pits, popcorn kernels, crab and shrimp shells, and any other hard or dense items that can stress the motor and jam the blades.
- Potential Damage: Hard items can dull or even break the blades, and in severe cases, cause the motor to overheat or burn out.
- Alternative Disposal Methods: Throw bones and other hard items in the trash or, if you compost, consider adding appropriate materials to your compost bin instead.
Use Cold Water While Operating
- Why Cold Water? Cold water solidifies fats and oils, making them easier for the disposal to grind up. Using hot water, on the other hand, can melt these substances, allowing them to coat the blades and pipes, which can lead to build-up and clogs over time.
- How to Do It: Turn on the cold water before you start running the disposal and continue running it for a few seconds after you turn the unit off to flush out any remaining particles.
Avoid Grease and Oil
- What Happens: Grease and oil can build up on the blades and walls of your disposal, hardening over time and eventually causing drainage issues.
- Best Practices: Always dispose of cooking oils, fats, and grease in a separate container and throw it away in the trash. If you accidentally pour a small amount into the disposal, immediately run cold water and a few drops of dish soap through the system to break down the grease.
Don’t Overload the Disposal
- Feed in Small Batches: Instead of dumping all the food at once, feed waste into the disposal in small batches. This helps the blades to effectively break down the food and prevent the unit from clogging or straining.
- What to Avoid Overloading: Avoid grinding large quantities of fibrous vegetables (like celery or asparagus) and starchy foods (like potatoes or pasta) all at once. These can wrap around the blades or create a paste-like consistency that clogs the unit.
Flush Your Disposal After Use
Even after the grinding stops, it’s essential to flush your disposal with water for a few extra seconds. This allows all food particles to be washed down the drain and prevents leftover bits from lingering and causing blockages.
- Proper Technique: Keep the cold water running for about 15-30 seconds after you turn off the disposal. This flushes any remaining particles through the pipes and helps prevent build-up.
When to Call a Professional
If you’ve tried troubleshooting your garbage disposal and it’s still not working, it’s time to call in a professional. Whether you’re in Kansas or Missouri, Anthony Plumbing, Heating, Cooling, & Electric can provide expert guidance and repair services to get your kitchen running smoothly again.
Toilet clogs are one of the most common household issues, but they don’t have to cause panic. With the right tools and techniques, you can often resolve the problem quickly and successfully.
In this guide, we’ll walk you through how to properly plunge a toilet and what to do when a plunger isn’t enough.
What You’ll Need Before You Start
Before jumping into the steps, it’s important to gather the necessary tools to ensure a smooth and efficient plunging process.
Here’s a list of what you should have on hand:
- Rubber Flange Plunger: A high-quality plunger with a flange (the rubber flap extending from the bottom) is ideal. It creates a tighter seal, making plunging more effective.
- Rubber Gloves: It’s always a good idea to protect your hands while dealing with any plumbing task.
- Towels or Rags: Keep these nearby to wipe up any splashes and prevent water damage to your bathroom floor.
- Bucket of Warm Water: Sometimes, warm water can help loosen the clog before you begin plunging.
Now that you have your supplies, let’s move on to the step-by-step guide for plunging your toilet.
Step-by-Step Guide to Properly Plunge a Toilet
1. Assess the Situation
Before diving in, check the water level in the toilet bowl. If the water is too high, consider using a bucket to carefully scoop some out to avoid overflow.
If the water is low, add enough to submerge the plunger’s rubber cup completely.
2. Position the Plunger
Place the plunger directly over the toilet’s drain hole, making sure that the rubber flange is fully extended and creating a seal.
The key to proper plunging is creating and maintaining a strong seal between the plunger and the drain.
3. Use Gentle Pressure First
Start with slow, controlled plunges to eliminate any initial air trapped in the plunger. Once you’ve established a good seal, begin plunging more forcefully.
Push down and then pull up without breaking the seal. Repeat this motion several times, aiming for a strong vacuum effect that will loosen the clog.
4. Increase Pressure Gradually
After a few gentle plunges, increase the pressure and speed. Continue plunging for 15-20 seconds, then pause to see if the water level changes. If the water begins to drain, the clog is likely dislodged.
5. Test the Flush
Once you see the water recede, try flushing the toilet. If the water drains normally, the clog has been successfully cleared.
If not, repeat the plunging process a few more times. In some cases, it may take several rounds of plunging to fully remove the blockage.
What to Do When the Plunger Doesn’t Work
Sometimes, a plunger alone isn’t enough to clear a stubborn clog.
If you’ve tried multiple plunging attempts without success, don’t worry—there are a few other strategies you can try:
Try Hot Water and Dish Soap
Pour a few cups of hot (but not boiling) water into the toilet bowl, followed by a generous squirt of dish soap. Let the mixture sit for a few minutes to soften the clog, then try plunging again.
This method can often help break down debris and make plunging more productive.
Use a Plumbing Snake (Drain Auger)
If the clog is deep within the toilet’s drain, consider using a plumbing snake. Insert the snake into the drain and slowly rotate it to break up the obstruction.
While this tool requires a bit more skill, it can effectively clear tough clogs that a plunger can’t reach.
Consider a Professional Plumber
If your toilet is still clogged after trying these DIY solutions, it’s time to call a professional. Persisting with more aggressive tactics could damage your toilet or plumbing system.
Professional plumbers have specialized tools and expertise to handle tough clogs safely and successfully.
For residents in Kansas and Missouri, Anthony Plumbing, Heating, Cooling, & Electric offers fast and reliable plumbing services to help resolve stubborn clogs and other plumbing issues. Contact us today to schedule a service appointment.
How to Prevent Toilet Clogs in the Future
Taking proactive steps to prevent clogs is much easier (and cleaner) than dealing with a blocked toilet. A clogged toilet can cause inconvenience, unsanitary conditions, and even damage to your plumbing system if it occurs frequently.
By implementing a few simple practices and making some adjustments, you can keep your toilet functioning correctly and reduce the risk of clogs.
Here are some tips to maintain your bathroom plumbing in good condition:
Use Less Toilet Paper
Excessive use of toilet paper is one of the most common causes of clogs. While it’s easy to reach for a large wad, consider using only as much as you need.
If you find yourself needing to use more toilet paper than usual, try flushing the toilet midway through the process. This will prevent the bowl from becoming overloaded and assure the paper has a chance to flow through the pipes without causing a blockage.
For families with young children, educating them on proper toilet paper use is helpful to avoid accidental overuse.
Avoid Flushing Non-Flushable Items
Despite being labeled as “flushable,” many items, such as wipes and certain hygiene products, are not designed to disintegrate like toilet paper. Items like paper towels, feminine hygiene products, cotton balls, and dental floss are notorious for clogging toilets and should never be flushed.
These products tend to expand in water, creating a tough obstruction that can lead to serious plumbing issues. Instead, keep a trash bin in your bathroom for non-flushable items and make it a household rule to only flush toilet paper.
Install a Water-Saving Toilet
Older toilets typically use more water per flush, which can sometimes lead to clogs due to excess water pressure and turbulence. Modern, water-saving toilets are designed to use less water while maintaining a strong flush that removes waste.
These toilets use about 1.6 gallons per flush compared to older models that use up to 3.5 gallons or more. By switching to a water-efficient model, you can reduce the risk of clogs, save on your water bill, and promote a more sustainable lifestyle.
Be Mindful of What Goes Down the Drain
In addition to monitoring what gets flushed, you should also be cautious about what goes down the drain in other parts of your home. Sometimes, bathroom sink and shower drains can feed into the same line as your toilet, so avoid washing large hair clumps or solid debris down these drains.
A blockage in one part of the plumbing system can cause issues in another, leading to a full-blown clog that’s more difficult to address.
Conduct Regular Maintenance and Inspections
Regular maintenance is key to keeping your plumbing system in top shape. Minor issues like slow-draining toilets, low water levels, or gurgling sounds can be early warning signs of a bigger problem.
Scheduling routine plumbing inspections can help catch potential issues before they escalate into major plumbing failures.
Consider having your drains professionally cleaned to remove any buildup and ensure smooth water flow. Anthony offers comprehensive plumbing services, including preventive maintenance, to keep your system running properly and avoid inconvenient clogs.
Consider Using Septic-Safe Products
If your home uses a septic system, it’s even more important to be mindful of what goes down the toilet. Septic systems are more sensitive to clogs, and even some types of toilet paper can cause issues if they aren’t labeled as septic-safe.
Using only septic-friendly paper and avoiding harsh chemicals will help preserve the health of your system and reduce the risk of clogs or backups.
By following these tips, you can significantly reduce the risk of clogs and keep your plumbing system in optimal condition. A few preventive measures today can save you time, money, and hassle in the long run.
Final Thoughts: Know When to Call in the Experts
While plunging a toilet is a skill every homeowner should have, sometimes the problem is bigger than a simple DIY fix. If you’re dealing with recurring clogs or suspect a more serious issue, it’s best to bring in the professionals.
Anthony Plumbing, Heating, Cooling, & Electric proudly serves the Kansas and Missouri regions, offering quality service from experienced plumbers. Whether it’s a routine clog or a complex plumbing issue, we’re here to help.
Schedule an appointment online or contact us directly for assistance with any of your plumbing needs.
Clogged drains are a common issue for homeowners, and while many clogs can be handled with household tools, some require a little more muscle. Enter the drain snake. If you’re dealing with stubborn clogs and have tried basic solutions without success, a drain snake might be the tool for you.
This guide will provide you with essential information on how to use a drain snake effectively and help you determine when it’s time to call in a professional.
What is a Drain Snake and How Does It Work?
A plumbing drain snake, also known as a plumbing auger, is a long, flexible tool designed specifically to navigate through your plumbing system to dislodge or remove blockages.
Unlike chemical drain cleaners, which can corrode pipes over time and potentially damage your plumbing, a drain snake offers a mechanical solution. It works by physically breaking up or retrieving the clog, which makes it both an effective and safe option for your home’s plumbing.
A drain snake is a coiled metal wire housed in a spool or drum, designed to navigate through pipes by bending around curves. When it hits a blockage, the coil grabs or breaks up the debris, allowing it to be removed or flushed away. This versatile tool can clear blockages like hair, grease, or small objects.
Types of Drain Snakes
There are several different types of drain snakes available, each suited for different types of clogs and drain sizes. Choosing the right drain snake is crucial to efficiently clear a blockage without causing damage to your pipes.
Manual Drain Snakes
Manual drain snakes are hand-operated tools ideal for small clogs in sinks and shower drains. They're affordable, easy to use, and require no electricity or special training. By cranking the handle, you extend the coiled wire to dislodge clogs caused by hair, soap scum, or grease.
Drum Augers
Drum augers are designed for toilets and larger fixtures, featuring a longer, thicker cable housed in a drum. They effectively tackle deeper clogs in toilets, bathtubs, and floor drains. Operated with a crank, drum augers are ideal for driving through tough blockages.
Electric Drain Snakes
Electric drain snakes are ideal for deep or tough clogs, powered by a motor that automatically turns the cable. They're especially effective for main sewer line blockages caused by tree roots, dense debris, or grease, requiring less manual effort.
Step-by-Step Guide: How to Use a Drain Snake
Although there are several types of drain snakes, the general principles of their use remain consistent. Below is a step-by-step guide on how to use a drain snake while avoiding common issues.
Step 1: Choose the Right Snake
The first and most crucial step in using a drain snake is selecting the appropriate tool for the job. Not all clogs are created equal, and using the wrong type of snake can make the situation worse or even damage your pipes.
Choosing the right drain snake is important so that you have the right amount of power and flexibility for the job at hand, minimizing the risk of damaging your plumbing system.
Step 2: Insert the Snake
Once you've selected the appropriate snake for your clog, it's time to begin. Start by preparing the area around the drain.
- Prepare the Drain: If you're working with a sink or bathtub, make sure to remove any stoppers, strainers, or overflow plates. This will allow easier access to the drain opening and ensure the snake can go in smoothly without obstruction.
- Feed the Snake into the Drain: Carefully insert the coiled end of the drain snake into the drain opening. Be gentle and avoid forcing the snake, as this could cause the cable to bend or kink, which would reduce its effectiveness.
- Twist as You Go: As you feed the snake into the pipe, twist the handle gently. This helps the coiled wire navigate the bends and curves of your plumbing system, especially in older homes with more complicated piping. The twisting action also helps prevent the snake from getting stuck on the pipe walls or sharp bends.
- Go Slowly: It’s important to take your time during this step. Pushing the snake too quickly can cause it to coil up within the pipe, making it harder to reach the clog.
Step 3: Work the Snake
Once you feel resistance or hear scraping sounds, you've likely reached the clog. This is when the snake becomes most effective.
- Handle Resistance Carefully: If the snake stops moving freely and you encounter resistance, do not force it. Forcing the snake can damage both the tool and your pipes. Instead, try to rotate the handle while gently pushing forward. This will help the snake work its way into the clog.
- Rotate to Break Up the Clog: By turning the snake’s handle clockwise, you can help the coiled wire grab onto the debris. Continue rotating the handle, pushing and pulling the snake slightly to either break up the blockage or latch onto it.
- Feel for the Clog: If the snake begins to feel less resistant after rotating, this is a good indication that the clog has been broken up or dislodged. You might feel the tension ease as the snake progresses further down the pipe.
Step 4: Remove the Snake
After working the snake and clearing the blockage, it's time to remove the tool from the drain.
- Pull the Snake Out Slowly: Carefully and slowly retract the snake from the drain. As you do this, some of the debris from the clog may come out with the snake. Be sure to have a bucket or towel nearby to catch anything the snake may bring up.
- Check for Clear Drainage: Once the snake is fully removed, run water through the drain for a few minutes to confirm that the blockage has been cleared. If the water flows smoothly and there’s no standing water, your job is complete. If not, you may need to repeat the process or consider calling a professional for a more thorough inspection.
Step 5: Clean the Snake
Once the clog is cleared, thoroughly clean the drain snake to avoid any buildup or contamination on the tool.
Troubleshooting Common Issues
Even with the best of intentions, problems can arise when using a drain snake. Here are some common issues you might encounter and tips on how to address them:
- The snake won’t go down the drain: This can happen if the snake is too large for the pipe or if the pipe is heavily clogged. Try using a smaller snake or removing the clog in smaller stages.
- The snake gets stuck: If the snake becomes lodged in the pipe, stop applying pressure and gently reverse the direction. Never force the snake, as this can cause damage to both the snake and your plumbing.
- The clog isn’t clearing: In some cases, the clog may be too far down the drain or too solid to remove with a snake. If multiple attempts don’t resolve the issue, it’s time to consider professional help.
How to Know It’s Time to Call a Professional
While a drain snake can be a powerful tool for tackling minor clogs, there are times when even the most skilled DIYer should hand the job over to a professional plumber. Knowing when it’s time to make that call can save you from further damage and costly repairs.
Persistent or Recurring Clogs
If you’ve snaked your drain multiple times and the clog keeps coming back, there’s likely a deeper issue that needs professional attention. Recurring clogs may indicate a larger problem within your plumbing system, such as tree root intrusion or damaged pipes.
Slow Drainage After Snaking
If your drain continues to run slowly after snaking, the clog may only be partially cleared, or there could be a buildup of grease, hair, or debris lining the walls of your pipes. A professional plumber can assess the situation and use advanced tools like hydro-jetting to fully clear the blockage.
Strange Smells or Gurgling Noises
Foul odors or gurgling sounds coming from your drain can indicate a blockage in the sewer line, which requires immediate professional intervention. Sewer line issues can lead to serious problems like sewage backup, which can damage your home and pose health risks.
No Access to the Clog
If the clog is located deep within your main drain line or in a hard-to-reach area, it’s time to call a plumber. Professionals have specialized equipment to reach clogs that are too far down for a typical DIY snake to access.
You’re Unsure of the Cause
Sometimes, clogs aren’t caused by debris alone. Corroded pipes, tree roots, or a collapsed sewer line can all mimic the symptoms of a clogged drain. In these cases, a professional inspection is necessary to diagnose the underlying issue.
By recognizing these signs, you can avoid costly damage and ensure your plumbing remains in top condition. If you’re unsure whether your clog is something you can handle, it’s always best to consult a professional.
Keeping your drains clear is essential to maintaining a functional and healthy home. While learning how to use a drain snake can save you time and money, it’s equally important to know when a problem is beyond a simple DIY fix.
If you find yourself dealing with persistent or severe clogs, the team at Anthony is here to help. We offer comprehensive drain cleaning services in Kansas and Missouri, so you can rest easy knowing your home’s plumbing is in expert hands.
For more tips on maintaining your home’s plumbing system, check out our blog on drain cleaning basics.